How I Got Started: Erik Howell

Let me start by introducing myself. My name is Erik Howell. I’m an Indianapolis native that recently moved to Portland, OR and have been brewing for just over 10 years. I love all forms of fermentation, and would consider myself a “maker/survivalist”. Haha. Sounds better than “doomsday prepper” doesn’t it? I first got introduced into craft beer in the early 2000’s when I was in college. There was a craft beer bar just down the street from my house called The Heorot Pub and Draught House that had an excellent selection of great beer from all over the country/world. They had a mug club that allowed you to get a special mug if you bought one of each beer they offered in the bar. I tried as many different beers as I could afford, however there was no touching that achievement 🙂

I remember a friend’s misfortune with his Mr. Beer kit in college, and I was absolutely certain I could do better. I ended up with the same Mr. Beer kit as a Christmas gift in ‘06 and went absolutely nuts. I did a bunch of reading (The Complete Joy of Homebrewing, How to Brew, Radical Brewing, etc) and went a little overboard on sanitizing. In the very beginning I was literally wearing a facemask and covering my countertops with Saran Wrap sprayed down with StarSan solution. It was like a scene out of Breaking Bad. My roommate at the time was super inspired, and footed the bill for a 5 gallon kit from Great Fermentations that I started using pretty regularly. I was an extract brewer for a long time (admittedly the first 5 years). The beer I was making was OK. I continued to acquire equipment and fine tune my brewing practices and things got much better over time.

I started a small beer tasting group/blog in 2012 called Beer is My Passion or B.I.M.P. We organized blind tastings in an effort to educate ourselves about what we liked and disliked about different styles of beer. Later I formed a homebrew club out of the group, and started pouring homebrew at beer festivals. It was so much fun! Right about this time I met my soon to be wife Jenn, and we started brewing together. We got involved in competitions, more beer festivals, and networking in the Indy beer community. We were officially out of control. Soon we were branching out into cider, wine, pickles, etc. Beer turned into a gateway for all things fermented.

After a few years running BIMP, I found that many of my friends were more interested in the blind tastings than they were in brewing competitions. I was now working part time at my local homebrew shop, and was meeting other like-minded homebrewers that were also entering competitions. We were all competing independently even though we supported each others successes and failures. Ultimately this new group of brewers grew into Circle City Zymurgy. Now that I’m in Portland, I certainly miss my friends, the meetings, and social events that CCZ hosts. I still have a small hand in maintaining CCZ’s website, and still enter beers via our club. Recently I’ve been making various meads, wines, and beer in my new home. I’m hoping to build steam for the coming year’s competitions, and who knows maybe I’ll see some of you at NHC in Portland next year!

How I Got Started: Allen Brown’s Story

I started brewing when I was 29, back in 1994.  This was about 2 years after my wife and I got married.  We’ll be celebrating our 25th wedding anniversary this year, which has been 23 of the best years of my life!…(and don’t tell Kim I said that!)

Back then, my LHBS was Great Fermentations in Indianapolis, located on 82nd street.  I purchased a “Complete Homebrew Kit” for $39.99, a “Glenbrew 7# Irish Stout” kit for $22.49, a copy of “Complete Joy Of Homebrew” for $10.00, and a two page printout by GFI titled “Basic Brewing Instructions for the Beginner Using Hop Flavored Malt Extracts.”  The receipt is dated one day before my 29th birthday, so it must have been my birthday present from my wife!  So I went home and learned how to brew beer. In the early 90’s, our choices on ingredients and yeasts were not even close to what we have now.  The internet wasn’t really available to the public yet, and I was brewing extract kits only.  The recipes I got from GFI were printed out on dot-matrix printer paper, and yes, I still have every one of them!  Most of them included liquid malt extract and dry yeast, and no telling how old that can of LME was that came over from England!

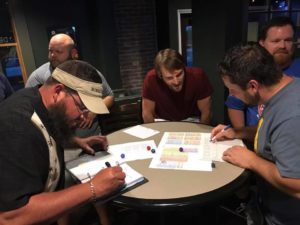
Of course back then I was bottling, and I was using bleach and water for all of my sanitizing because that’s what we did.  For the first two years I brewed about every other month.  Each time I did, I set back a six pack of brew I made for safe keeping.  Then, I had a big beer party… I had about 4-5 cases of multiple flavors of six packs and I asked everybody that came to the party to bring a six pack of beer that they have never tried before.  The reason was, none of my friends drank anything but “big beer”, so I wanted to expand everybody’s pallets a little bit.  That party was a HUGE SUCCESS!  I got rave reviews for my beers, and ended up the next day with a BUNCH of free beer in my fridge!

Over the next few years I slowed down a little bit, to a couple of batches a year.  Then when we had kids, I went probably another two or three years without brewing. I know, nobody wants to admit it, but it happens to all of us.

The next few years I got back into it and brewed 2-3 batches a year.  Then I started to get motivated again, and started brewing on a regular basis. At this point, I was probably 15 years into my brewing career.  Keep in mind, I am still just brewing extract kits after all this time.  I was really into the ease and convenience of kits, and I was brewing some very good beer.  At least that’s what my friends told me when they came over to drink free beer!  It wasn’t until a couple of years ago that I started brewing all grain.  I know that most people get into all grain much sooner than that, but people need to know, you can can make some really good beer brewing extract beers!  I happen to know several people who have won awards brewing extract kits in big competitions.

So, jump back to 2009.  My wife and I started really enjoying drinking dry red wine, as well as beer.  I had tried a few peoples homemade wines in the past, but they all sucked, so I wasn’t really that motivated to try making my own wine.  Well, in 2009 we decided to go to Austria to visit distant cousins that we’d never met before.  Turns out that we have two cousins that live in this little village in Austria that have commercial wineries, and we can even buy their wines here!  After finding out that I came from a long line of winemakers, that motivated me to start making wine.  So, I started researching on the internet.  Turned out there was a HUGE amount of information out there, and there was a bunch of people out there actually making good wine.  Who’d a thunk it?

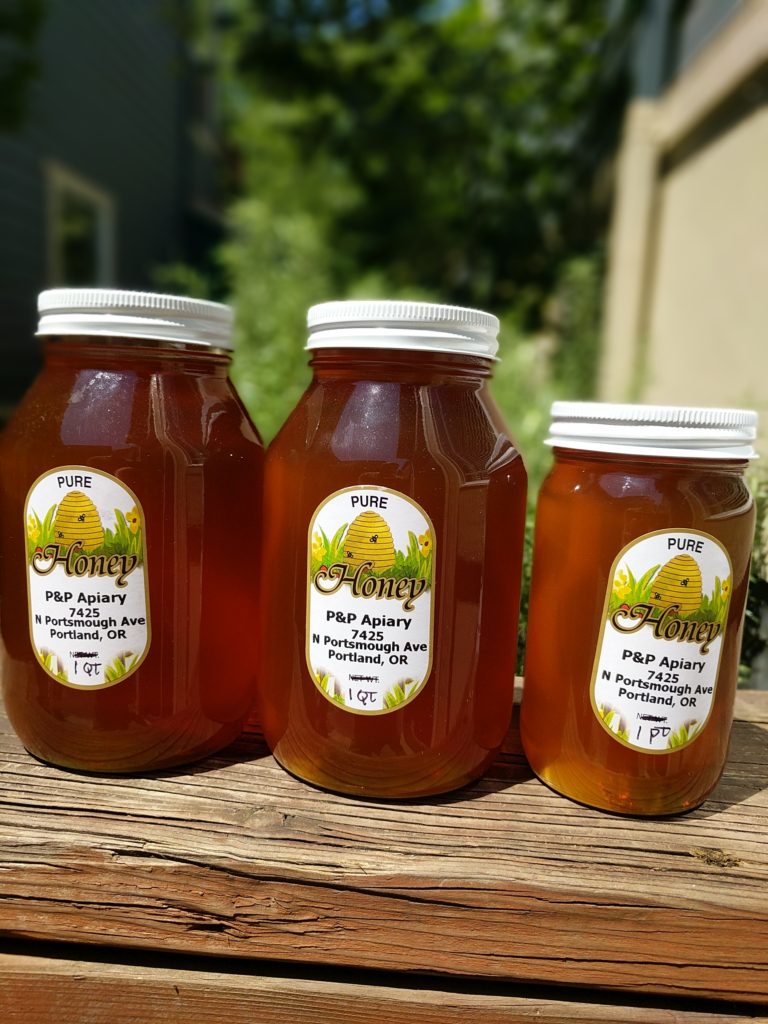
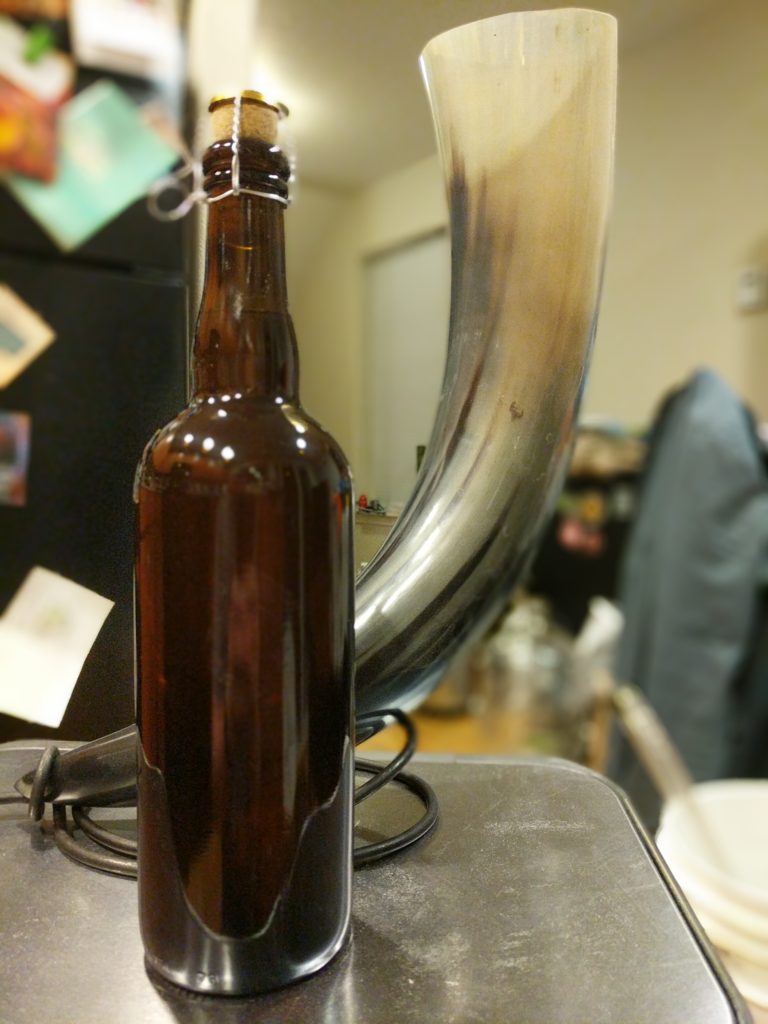
My first wine I made was a honey mead wine.  The recipe I used was “Joe’s Ancient Orange Mead.” It’s a very simple mead recipe using 3.5 pounds of honey protein gallon, one orange cut into quarters, one cinnamon stick, one whole clove, a handful of raisins, and a pinch of nutmeg.  Mix it together, and add Flieschmanns bread yeast, and let it sit for two months without touching it.  At two months it will clear and most of the fruit will drop out.  (I know, you are thinking that’s just crazy talk using bread yeast, but it’s a tried and true recipe that been made millions of times successfully).

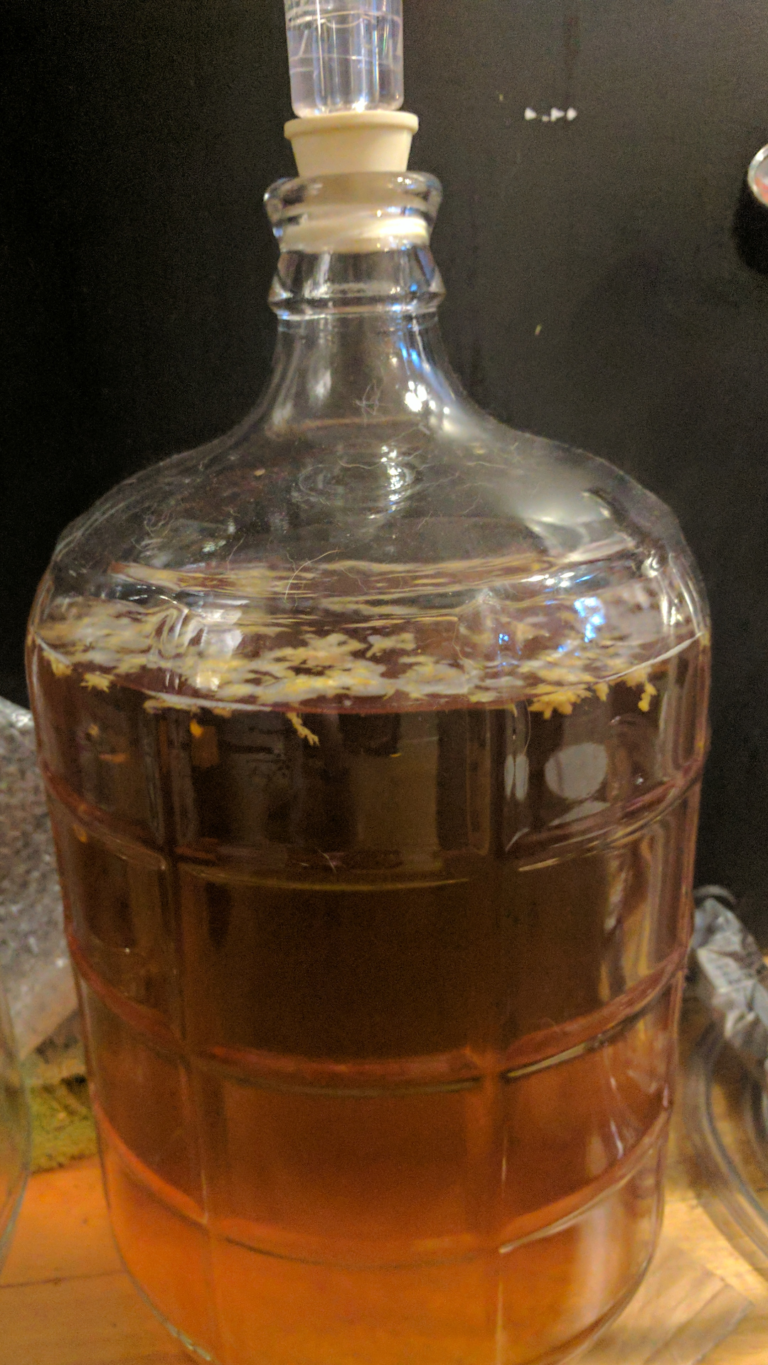
Even though I’ve never entered a single beer into a beer competition, I decided to enter this mead into the Indy International Wine Competition.  I ended up winning Honey Wine Blend Of The Year 2010!  I’m sure if the “mead aficionados” knew I made a mead with bread yeast they’d verbally crucify me! The next year, I started buying kit wines from Great Fermentations made by WineExpert.  I started making a bunch of kit wines.  I also started entering my wines in the Indy International. In 2011 I won Indiana Amateur Winemaker of the year! The next year, I got red wine juice from Easley Winery.  I got some Chambourcin juice that was grown in southern Indiana, fermented it, and then did a malolactic fermentation on it, entered it, and won Indiana Grown Wine Of The Year!  In a three or four year period I won about 30 medals, bronze, silver, gold, and even three Double Golds!  Now, I usually buy about 30 gallons a year of fresh juice from GFI, ferment it, keg it, and keep it on tap with nitrogen.

I don’t think that the reason I won all these awards were some kind of magic mojo I have, I honestly believe that it is because I followed the directions and recipes EXATLY TO THE TEE!  I made sure my fermentation temperatures were just right, my sanitation was perfect, my timing of racking, oak additions, malolactic Fermentations, etc., followed time tested schedules, and most of all, I TOOK MY TIME.  It’s all about consistency.  You don’t have to reinvent the wheel, just follow the dang directions!

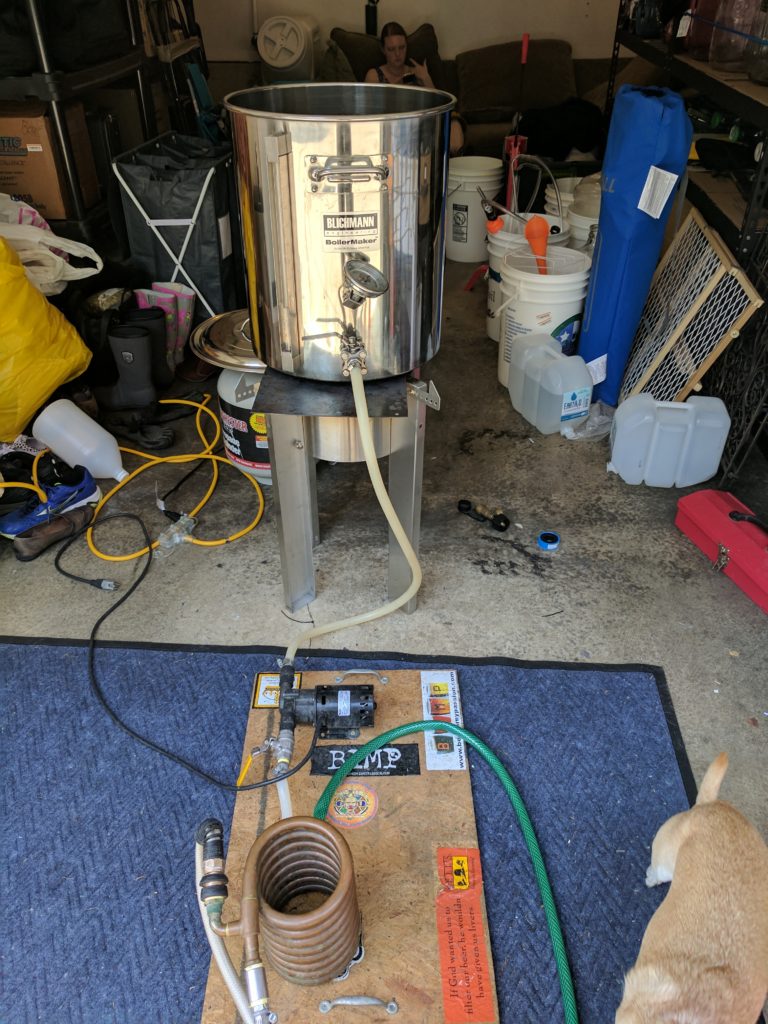
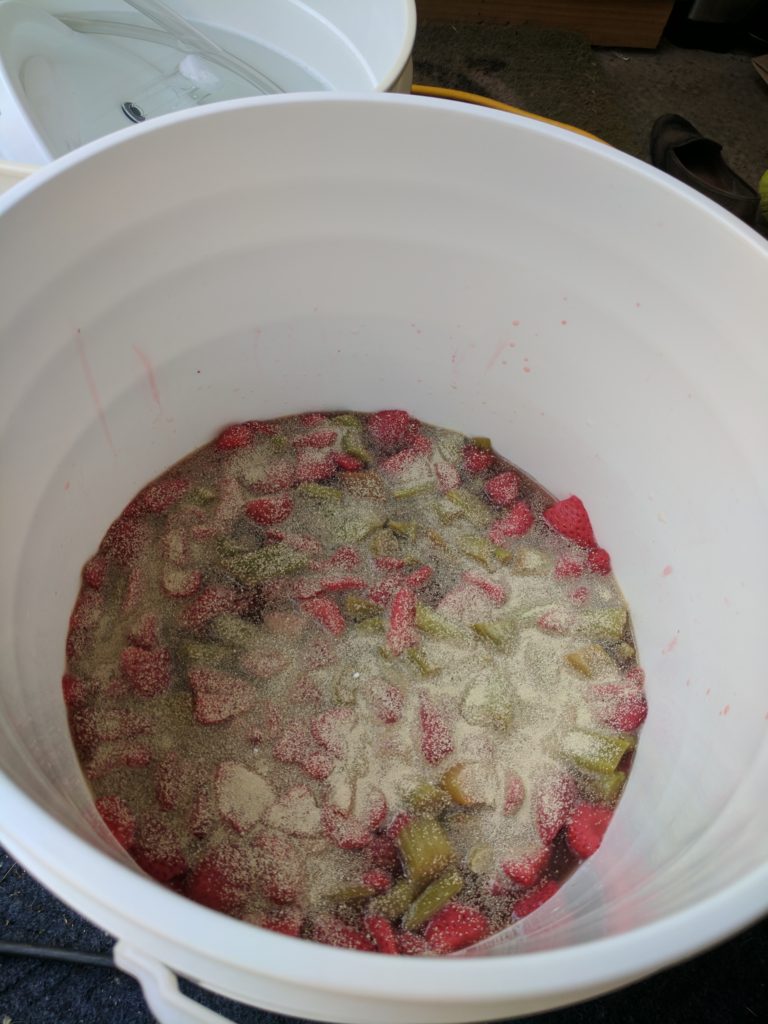
Fast forward to last year, I decided to up my game!  I built a single tier R.I.M.S. System brew stand.  I now have a 15 gallon Spike HLT, a 15 gallon Spike MLT, and a 20 gallon Blichmann brew kettle.  I’m now brewing 10-15 gallon batches, twice the amount of beer in the same amount of time!  I now also use BeerSmith software for designing my recipes.  It really has helped me get my recipes figured out, and helped me to brew consistently.  The last thing I want to share is I have really started to get my brewing water totally dialed in.  I purchase Primo Water for my brewing.  It’s five gallon jugs of R.O. Water that has minerals added to it.  I took a sample of my home city water, and a sample of the Primo Water, and sent them off to Ward Labs to be tested.  My local water came back SO BAD, that it really can’t be used for brewing.  It’s not that it’s contaminated, it’s that the Bicarbonate, HCO3  is 515 ppm, and the Total Alkalinity, CaCO3 is 426 ppm… way too high for brewing. So, I take those results from the water test, and I enter it into John Palmer’s water spread sheet, (free from his website), and it tells me exactly what I need to add to the water to get the BEST BEER for the style I’m making.

Needless to say, I am now making some pretty darn good beer.  Just ask me!

Mash of Wonder Competition Update

Last month, Circle City Zymurgy conceived their first-ever homebrew competition. The Mash of Wonder was going to take all the nerdiness and excitement of brewing and tabletop games and combine them into one of the more interesting, unique competitions around. Since then, the competition ballooned into something bigger and more ambitious than anyone in the club could envision. In the end, 32 teams of brewers registered to participate in The Mash of Wonder, including our wonderful sponsors at Great Fermentations, Imperial Yeast, and the Cone Keepers Hopyard!

Getting my DM on

Last week, everyone gathered at the Noble Order taproom in Zionsville to roll for their fates. It was a fun, exuberant affair. I very much enjoyed being the “DM”, presiding over the event and informing my fellow homebrewers of their fates. Each favorable throw was met with groans from bystanders, and each disastrous one met with shouts of approval (yours truly somehow ended up with basil, cardamom, and sarsparilla…FML).

Game Faces

You can view the results of everyone’s throws by following the link below. The plan is to provide continuing updates on the competition as we go along. If you missed the deadline to register and are still interested in participating, you can still come to the November 8 club meeting at Great Fermentations Indy, where we will announce the results and you can sample some of the beers yourself. We are also still looking for volunteers to steward the event. If you want help out and see how homebrew competitions work, stewarding is an excellent way to do so. Email me at events@circlecityzymurgy to sign up to steward. Thank you so much to everyone who signed up and to all our sponsors. This is going to be a fun next few months.

MoW Results

Indiana On Tap Tasting Society Recap – An Outpouring of Love

On Friday July 21, Circle City Zymurgy participated in the July gathering of the Indiana On Tap Tasting Society. The goal of these events is to showcase our state’s fine breweries and/or the beers available throughout the state by bringing something special and different to each event. In fact, no two monthly events are the same. The events are intimate–think more of a swanky party instead of a beer festival. What’s cool about this is attendees had plenty of opportunities to talk to the brewery staff and the brewers themselves. As a bonus, these tasting society events are also Indiana’s premier venue for trading rare and hard-to-find beers from all over the state and the nation.

CCZ members including myself, Nick Boling, Jonathan Marting, and Matt and Lauren Wolford had a great time pouring our beer and representing the club. Joining us were Rhinegeist Brewery from Cincinnati and Creatures of Habit from Anderson, IN. For this event, Indiana on Tap partnered with Bottom’s Up, which meant we got to serve our beer on their awesome draft system. Thank you to Bottom’s Up for providing pouring enjoyment for our crew! As the indoor temperature rose to meet that of the outside, the event space filled with throngs of thirsty beer geeks. Having the premier pouring space, most guests queued up in front of the Circle City Zymurgy booth. We started the night with a broad spectrum of brewing styles for the tasters; Russ Der Cogburn Lemon Shandy, A Southerner in London (A hazelnut praline English mild), Meeb’s Milk Stout and Grapefruit Baby Doll (An American pale ale enhanced with Amoretti Ruby Red Grapefruit artisanal flavoring). The CCZ line quickly became THE place to be with lines surpassing all other pouring stations for a majority of the night. As the night progressed so did our lineup of tasty malt beverages, such as Mr. Mild Mannered (English Mild), Juicy Lucy New England IPA, 124 Conch Street (Pineapple Wheat) and Tears of a Wookiee American pale ale). All told, the CCZ crew floated 8 kegs in less than 3 hours, while Rhinegeist and Creatures of Habit had a sufficient supply of brews on tap. The ambiance was a hip and cool with party tunes provided by DJ 3pm, beer flavored cupcakes by Tipsy Turvey of Anderson, handcrafted pirogi from The Pirogi Truck and craft hard sodas from Garden Party Botanicals.

Overall this was a very successful night of pouring for CCZ and the club members who participated. With this being a monthly event, there will be plenty of opportunities for other members of the club to participate, however, be prepared to meet the high expectations set by the inaugural crew and remember to bring PLENTY of beer!

[slideshow_deploy id=’1130′]


Thank you to CCZ member Rob Ecker for this recap. This blog post has been edited and condensed for clarity.

10 Step Strawberry Rhubarb Melomel Tutorial

I recently came into possession of 5lbs of fresh garden grown green rhubarb and wanted make a special batch of mead this summer. I’ve been trying to hone in my mead making abilities and thought that a strawberry rhubarb melomel may be the best way to use all of this fresh rhubarb. Now all I needed were a few extra ingredients. I picked up a case of fresh picked organic strawberries and some fresh spring harvest honey from the Canby berry farms South of Portland at the local farmer’s market. The honey was light and had a slight brightness to it that I think will pair perfectly with the fruit.


Step 1: Wash the fruit, chop, vacuum seal, and freeze.  I filled the kitchen sink with a mixture of distilled white vinegar and water to wash the fruit (1 cup of distilled white vinegar to 8 cups water) using a brush to gently scrub everything. Some people include dish soap into these washes, however I do not do this. Fruit washes in a vinegar solution are a great way to extend the life of your fruit as it kills off native yeast, mold, and bacteria on the fruit. Once washed, I rinsed the fruit and started cutting it into smaller pieces. I cut the strawberries into halves and chopped the rhubarb into 2 inch pieces and weighed them. I used 3lbs of strawberries and just under 4lbs of rhubarb (which approximated to the same ratio I found in a strawberry rhubarb pie recipe online). I then threw them into vacuum sealed bags and froze them. Looking up pie recipes inspired me so much that I plan on making my next batch of mead using whole fresh baked fruit pies (cherry pie, huckleberry cobbler, or possibly even blueberry pie).

Step 2: Thaw fruit and refreeze This step is something I’ve only recently started doing. By freezing, you burst the cell walls of your fruit which makes juice more available. By freezing twice you further break up the fruit. Once it has thawed a second time, the fresh fruit now has a consistency of canned peaches.

Step 3: Thaw fruit and prep for brewday. Measure out yeast energizer, yeast nutrient, and pectic enzyme for 3 gallons of finished melomel and place them into a small bowl. I use half the recommended amount of yeast energizer and nutrient so that I can add more a few days into fermentation. Prep a rinse bucket and sanitizer bucket for your brew station. Set up brewing kettle and burner, measure out 5 gallons of filtered water, and set up your cooling workflow (I run a chugger pump into a counterflow wort chiller to quickly zapp the boiling liquid down to fermenting temperature and push it directly into my primary). Because I’m working with honey, I placed these beautiful jars of fresh honey in the sun to heat up and become less viscous (100°F outside today in Portland, OR. Ouch…).

Step 4: Test the system with boiling water to sanitize and work out any kinks. Once your water is boiling, cut the propane on your burner and connect your chiller setup to the ball valve on your kettle. Open the valve and let it flow into your chiller.  I power on the chugger pump for a few seconds to help start the siphoning process into my chiller before turning it off and letting gravity drain the water level down to 3 gallons. Once it’s reached 3 gallons close the ball valve on your kettle. Running boiling water through your chilling setup ensures that you are killing any yeast, bacteria, or mold that may be housed in your equipment.

[WPGP gif_id=”1093″ width=”600″]

Step 5: Pour in your honey and stir to dissolve it into your heated water. My preheated honey pours just like warm motor oil. Make sure your heat is off while stirring in your honey to prevent scorching the sugar. I used a ratio of 2.5lbs of honey per gallon of water for a total of 7.5lbs of honey that will finish out at around 10.6% ABV (If I were to do this again I would have used 1.5lbs of honey per gallon to bring the ABV down to around 6-6.5% ABV).

Step 6: Chill your mead down to fermenting temperature and clean. I kick on the hose pushing water through my counterflow wort chiller, open up the valve on my kettle, and then power on my chugger pump. This draws my mead into my chiller and out of the system after passing through my Blichmann Thrumometer. I can adjust the temperature of my cooling mead by adjusting the kettle valve on my pot or the additional valve installed after the pump just before the chiller. This slows the flow of the mead while in the chiller which increases the contact time with the copper cooled by the water in system. I pumped my mead into my primary at 70°F.

Now that the brew day is over it’s time to clean. Make sure to scrub down your equipment, rinse, and dry everything. I also run additional boiling water through my chiller one last time to clean the inside of the chiller and heat up the copper to stave off bacteria before closing off the system. As you can see, I have Pedro’s approval that all is clean and ready to be packed away.

Step 7: Add your fruit and pitch your yeast. Now that you’ve transferred all of your mead into your cleaned and sanitized fermenter, add your fruit. Give the mixture a stir and take a gravity reading. The mead I made today was 1.080. Pitch your yeast on top of your fruit along with your nutrients and pectic enzyme. I use half the recommended amount of yeast energizer and nutrient, and add the other half after about 4-5 days. This helps provide the yeast with nutrients that it needs to continue powering through all that sugar. You can add the whole recommendation of pectic enzyme though. You want as much pectin to settle out as possible during the fermentation process to improve the clarity of your finished mead. There are a lot of different yeasts you can use for mead. Red Star Pasteur and Lalvin EC-1118 are both champagne yeasts and will ferment out dry without too much characteristics from the yeast itself. Wyeast Sweet Mead or Dry Mead are two liquid options that I’ve had a lot of luck with in the past. Today I’m using Mangrove Jack’s MO5 Mead yeast.

Step 8: FermentWhen I make beer/cider/wine I like to make sure I give the yeast plenty of time to do its thing. Don’t rush your mead through the system. The more times you open your fermenter, the more you expose it to Oxygen which will oxidize your finished product. That said, your mead is actively fermenting in the first 3-5 days. That’s a perfect time to throw in the rest of your yeast nutrient. Once you’ve done that, leave it alone for at least a couple of weeks at the proper fermenting temperature and then take a gravity reading. If the mead still has a way to go give it another week. Your final gravity should be 1.005 or lower. This will ensure it is not too sweet and ensures that the yeast has finished fermenting. If you are higher than 1.005 that is ok, it will just be a little on the sweet side.

Step 9: Rack your mead off the fruit and store in glass carboy for aging. Unfortunately this step can get a little messy. Above is a picture of a nectarine mead I recently racked into a 3 gallon glass carboy. The nectarines were so mushy they were easily pulled up into my racking cane and over to the secondary. It’s not the end of the world, but I’ll likely rack over to another carboy to remove the rest of the fruit and sediment. When racking your mead off of the fermented fruit, use extreme care. Your fermenter will likely have fruit still floating on top, and yeast accumulating at the bottom. You want the good stuff in the middle. Before you start transferring your mead over to a sanitized carboy I would recommend using a sanitized spoon to remove the floating fruit. Use care to not stir up the yeast at the bottom of the fermenter while removing the fruit. Transfer the mead over to glass with an autosiphon and age in glass. Over time you will notice that your mead will start clarifying, and yeast/fruit particles that will start settling out. If you are a stickler like I am you will likely rack your mead over to another carboy to further clarify your mead. Another thing to note is that I purge out the Oxygen in my fermentors when I open them up with CO2 from my kegging system. It’s a great way to decrease oxidation from taking root.


Step 10: Keg or bottle your mead. I prefer kegging my ferments as I can bottle directly from the keg using my Blichmann Beer Gun. This allows me to purge CO2 from my bottles before corking/capping my bottles. There is nothing wrong with bottle conditioning, however I prefer to force carbonate over conditioning in a bottle. You have officially made yourself some delicious mead! Chill and serve in your favorite glassware or in my case a fancy 2L drinking horn.

Mead has been made for thousands of years. Don’t feel like you have to buy a bunch of equipment to make it. I’m literally using equipment that I have accumulated over 10+ years homebrewing. Make sure you are using the freshest ingredients you can find. Use good sanitation practices. I would suggest using a glass carboy to age the mead in. Tuck your mead away and forget about it for a year (although make sure to keep the airlock filled) so that it can mature. I’ve found that cider and mead that have been aged for one year are much better than “hot” mead that was rushed into a bottle.  Consider aging some of your mead with liquor soaked oak cubes or maybe even adding some other microbes to the mix to create new and exciting flavor combinations. You can even blend finished meads together with cider or fruit wine!

Meeb’s Milk Stout Tapping

Come out to the Noble Order taproom in Zionsville on June 29 as they officially tap the second of our collaboration beers with Noble Order Brewing Company! CCZ member Nick Boling and Noble Order Brewmaster Mike Miller have collaborated to bring you Meeb’s Milk Stout. Based on Nick’s National Homebrew Competition-finalist recipe, this is a smooth, balanced, excellent stout. A portion of the sales from this beer go to support club activities; so you get to sample an excellent beer and help out Circle City Zymurgy. Meeb’s Milk Stout will be available until the keg runs out, so make sure you get it while you can!

Brew-Ha-Ha 2017 in the Books!

The Phoenix Theatre’s 22nd annual Brew-Ha-Ha was this past Saturday. Every CCZ member who poured and attended had so much fun at Indiana’s oldest beer festival. We ended up floating four kegs and several bottles of sours during our special VIP-tapping (everyone seemed to love our sours). Even a malfunctioning Randall and a mid-festival rain shower couldn’t put a damper on our spirits. It’ll be interesting to see how the festival changes if and when they move it to the new site of the Phoenix theatre. But as long as it maintains its intimate size, quirkiness, and residential charm, it should remain one of the best beer festivals in the city.

[slideshow_deploy id=’1035′]

Death and Taxes Experience

Death and Taxes Day was a fantastic event that I was happy to be a part of, so I first want to thank them (Taxman Brewing Co.) for putting on this event and hosting us, as well as thank Steve Kent for getting us the opportunity to pour there. As many of you know, we were able to come up with a variety of beers to serve at the event that all seemed to be a smash hit, as we served 20 gallons of beer in under 2 hours! Many thanks go to Matt and Lauren Wolford as well as Jeremy Railey for the contributions to the event. CCZ brew recognition is growing whether we look at Untappd or on the spot reviews! As for the event, we had some wind, but it turned out to be a beautiful day. Everything from the glasses to the Evasion bottle release were fantastic! Well, except for those who broke their commemorative glasses. I had the opportunity to sample all of the variants except the coconut Evasion variant. They were all delicious, especially the blueberry variant they sampled the last hour. As a club, we completely filled our email list form with people excited about our beers as well! That is probably the best way of quantifying our success, so way to go everyone! There were countless breweries there serving as well. I even tried one out of Columbus called Powerhouse for the first time. Their aged Tart Cherry was something of dreams! So to wrap it up, it was a phenomenal event, looking forward to next year, and I’ll see you all at History on Tap June 2nd! Cheers!

Thank you, Jeremiah for sharing your Death and Taxes experience! 

Cincy Beerfest Review

Cincy Winter BeerFest: On February 17th and 18th , Cincinnati held its 10th annual Winter Beerfest. This beerfest is unlike any that I have ever been to. There were over 500 beers from over 150 breweries, there was live music for entertainment, food trucks with anything from mac and cheese to barbeque to Asian small plates to a donut burger. If you could imagine it in either beer or food it was more than likely in the Duke Energy Center, including a silent disco. Unlike the Indy Winterfest, it was not nearly as cold nor did people have to stand out in freezing temperatures to get in and enjoy the fruits of so many brewers labor. The convention center was set up so that pre-banding occurred within the same building as the event, literally just upstairs from the main entrance. There was a plethora of security guards to check your ID’s and once you were proven to be worth (21+ yrs. of age), there were around 15 or so lines to let you through to the beer if you hadn’t been pre-banded. Overall the layout of the event and flow of people was astronomically better than Indy Winterfest and there was no need for discounted tickets to another event.

With this being my first beerfest outside of the state of Indiana I was shocked to learn that other states have odd and sometimes confusing alcohol laws and that we aren’t the only crazy state in the Union with some random blue laws. In Ohio, there has to be an exchange occur for alcohol to be served. For this event, everyone was given 25 little blue tickets to exchange for their beer. Interestingly enough, I still had a majority of my 25 tickets left at the end of the night and I didn’t skimp on drinking. If the pourers were from the brewery they really didn’t care about the tickets, they just wanted you to try their beer. The volunteers who were pouring for breweries on the other hand were more in tune with the law and kept asking for the tickets. But enough about how it was different from Winterfest and random state’s blue laws and on to the important stuff, specifically the people, the beer, and the event.

The people, what can I say, the people were awesome. First, Lauren, Vicki, Mickey and myself were in attendance from CCZ (sorry if we missed anyone), and we had a great time hanging out and drinking beer. For a majority of the event it was a free-for-all and we dispersed like a rabid pack of dogs on the event. I went one direction, Lauren followed but headed to a separate table and Mickey and Vicki were off on their own escapades. As all of us had purchased VIP entrance tickets, we were given the 25 tickets and an 8oz glass. Needless to say, I do not need 200oz of beer let alone in a 5-hour period, so Lauren and I were able to split drinks and enjoy more samples without becoming so intoxicated that a small spark would have ignited us. We took the more casual approach to maneuvering the 500 beers and 150 breweries and set out to try beers we hadn’t ever had or breweries we hadn’t heard of. This allowed us to pick and choose the lines we wanted to wait in (not too many) and also spend time talking to the brewers who were more than gracious to talk to a couple of homebrewers who enjoyed their beer (thanks Wooden Cask). Vicki on the other hand had her lineup set with the have to have 30+ beers, the want to haves (another 20+) and then the ‘if I am still standing and want more’ beer list. This plan worked out quite well for Vicki as she was able to check off her entire must have list.

The Beer. Where do I even begin with the beer. Let’s start with the Beer List. There were breweries that were local to Cincinnati, there were regionally located breweries and then you had the giants of the craft beer industry. All of them were more than happy to provide a tasty beverage and some even produced some out of this world samples. My favorite sample was from the already mentioned Wooden Cask who is a recently opened brewery from nearby Newport. They had some spot on British beers with an English Brown Ale that was the perfect balance of malt and hops and an English Porter. I also found that Figleaf, a brewery out of Middleton, OH also produces a great English Special Bitter (ESB). I went into this event really excited to see that a lot of breweries were bringing their Kolsch’s to the event. However, in the end I only got to sample one as the rest of the breweries did not have it. The one I had was just OK, there were some off flavors not normally present in a kolsch. Overall, the beer provided was overall on the up and up and whatever type of beer suits your fancy, you could find it and then some.


The Event. This is an event that I will definitely go back and we are already making plans and trying to get a bigger group to go down and enjoy with us. The people who are volunteering are wonderful, the breweries provided great beer, the venue is set up great for an event and the people of Cincinnati are wonderful and were great hosts. At any point, you were likely to bump into someone, but everyone continuously was saying excuse me and apologizing for bumping into each other. This was a refreshing atmosphere when compared to many events where people get to intoxicated and manners go out the window. Overall this event is one that is a top recommendation for anyone wanting to go to a beerfest outside of Indiana and provides for a nice easy drive and weekend away. Also, see Jungle Jim’s, Ikea, and Bass Pro Shops but that is not beer related, except Jungle Jim’s. While there weren’t any homebrewers and homebrew clubs pouring at this event, we all enjoyed the fruits of many brew master’s labor and will likely be attending the 11th annual Cincy Beerfest.


Matt Wolford – Cincy Beerfest Review

Wait For It… (Winterfest Recap)

‘Twas a blustery day in early February, when the Brewers of Indiana Guild chose to hold their 9th Annual Winterfest at the Indiana State Fairgrounds.  Who am I kidding?  It was FREAKING COLD, thus the aptly named Winterfest.  This year sported a selection of more than 100 Indiana micros and guest breweries from the Midwest, all pouring between two and six different styles to a sellout crowd of 6,000 thirsty Hoosiers and HooYaWannaBees!  I overheard various guests mention their travel from nearby Chicago, Cincinnati, Louisville, and even as far away as Honolulu, Hawaii!  I myself Uber’ed from the Residence Inn on the Canal in downtown Indy.  That in and of itself should have been a sign of foreboding as the driver and I neared the intersection of 38th and Fall Creek PARKway.  The parkway was a parking lot!  The fairground was a spectacle of Biblical proportion.  Like Pharaoh’s army chasing the Israelites through the desert, the swarm of humanity was exhausting.

Now, leave it to fairground management to schedule 5 of the largest events to hit Indy on the same bitterly cold Saturday in February, plus a minor-minor league Hockey game.  All told, there was the beer festival, a Lumberjack wood working gala, Boy Scout Memorabilia auction, The Great Train Show and the Purdue Ag Alumni Fish Fry!  I heard that there was also a D-List Porn Convention being held in the Barns, but I cannot confirm nor deny its existence.

Back to beer, or at least lines for beer.  With an advertised sellout crowd, the festival planners failed miserably to execute the ingress of all 6,000 attendees in a timely manner.  Many in attendance waited more than an hour to enter the West Pavilion to sample the carbonated concoctions from around the state.  Much like the Israelites in the desert, it was a long, long walk.  Except it was colder, much colder, and like the Israelites, the flock only had bread to eat.  Okay, they had leavened bread in the form of pretzels hung around their necks with assorted jerky’s and beef sticks.  Upon final entry into the pavilion, many of the adornments had already been consumed to fuel their warmth generating bellies while in queue.  Back to this later, let’s get to the beer.

Once inside the hall, this year’s layout of the event was much easier to navigate than in years past, where the brewers were spread between two buildings.  Having recently returned from GABF where the brewers are alphabetized by region, the haphazard positioning of Winterfest had no rhyme or reason.  Now, don’t get me wrong here thinking that everything about this event was negative, it was a lot of fun and I tasted some crazy good brews!  But let’s talk about the event from our perspective as homebrewers.

Setting up for the big event

As a homebrewer, I enjoyed the experience of watching guests taste the fruits of my hard labor and hours upon hours of cleaning and sanitizing everything in sight.  As a club, we were well represented by Tanner Andrew, Jarrod Otter, Nick Boling and myself.  We shared our booth space with Wes and Bryan from Great Fermentations and together we represented homebrewers in a bright and shining spotlight!  The first question after people tasted their beer for the first time was, “Where are you guys located?”  My standard response was “Garages, barns, dark basements and spare bedrooms in our mom’s house around Indianapolis.”  When people ask where they can get more of what you are offering, you must be doing something right!

From a style perspective, we poured a Milk Stout on nitro (Meeb’s Milk Stout by Nick Boling), a peppermint chocolate porter (Dark Mint Lord by Tanner Andrew and Jarrod Otter) and an East Coast IPA (Juicy Lucy by Robert Ecker).  All three offerings were well received and fulfilled the needs of the thirsty public.  Dark Mint Lord enticed those who kept swiping the leftover Andes mints in front of the table and asking, “Why the mints?”  Tanner and Jarrod ran their beer through a Randall that contained a butt load of Andes Mints!  What a brilliant idea and a perfect balance of the sweet chocolate mint flavor against the roasti-ness of the robust porter.  Nick’s milk stout stood up against any number of stout offerings from other breweries.  The creamy mouth-feel of the beer gas nestled among the residual lactose sweetness was tempered with just the right amount of acidic acrid roast we love in our dark beer.  In an effort to introduce the New England IPA craze to Indiana, I created a simple yet extremely flavorful and aromatic IPA that was full of haze and flavor.  Using flaked wheat and oats, as well as dry hopping during primary fermentation, and again four days later, this cloudy tang colored brew was loaded with Citra, El Dorado and Mosaic hops, but not the tongue turning bitterness that turn off many non-IPA drinkers.

Proudly supported by our CCZ brethren and sisters, adorned in their CCZ shirts, our club was loud and proud and could have poured much longer and pleased many, many more drinkers.

If you suffered through the long, long wait to get into the hall, the Brewers Guild has offered a gracious discount on upcoming events such as the Microbrewers Festival at Military Park or next year for Winterfest, where they pledge to have a more streamlined process in place to allow fest goers to enter in a more efficient and timely manner.

Until then, Cheers!

Rob Ecker, Winterfest 2017 Review

Rob’s emptied Juicy Lucy keg after a successful pouring with CCZ at Winterfest 2017